Monday, September 10, 2007

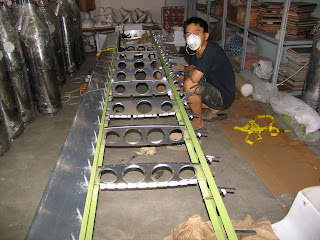
Stopping by for another photo shot. Looking back at my 2 weeks in KL, much has been achieved though more should have been done if not for my mistake in not bringing my drill bit set over. I will be back for more!
Posted by Picasa
Another repeat for the upper inboard skin.
Posted by Picasa
Repeat this process for the upper center skin. Note, at this point in time, the spar cap which should not be placed underneath the aft spar has already been drilled without my knowledge then.Sigh again!!
Posted by Picasa
Seen here in this photo, i drilled and clecoed the outboard main upper skin to the left wing aft spar at few places ,followed by one place /rib in the aileron cove.
Posted by Picasa
Btw, i did not follow the manual w/reg clecoing a scrap aluminium in order to clamp the main skin tightly on the leading skin (which i find it unnecessary). Here, using #40 bit again, i drilled and clecoed the skin to the main ribs in three places .
Posted by Picasa
The outboard upper main skin was placed in position and drilled at its front spar after alignment check.
Posted by Picasa
On a hindsight w/ regd to the spar cap mistake, the cue to trim the main rib to accommodate the cap (something not mentioned in the manual) should have triggered me to stop and think abt what i was doing in order to prevent such blunder. Anyway, past is past. Will learn to be wiser from now on..
Posted by Picasa
Looking back on this photo, i now realised my mistake in installing the spar cap for the aft spar. Note: they are only meant for the front spar. Can only salvage the undrilled cap clamped on the lower flange of the aft spar. As for the cap already drilled at certain places on the aft spar, i doubt it could be salvaged. Worst come worst, i will fabricate another one. Sigh... all in a name of lesson learnt.
Posted by Picasa
Cutting and especially filing the spar cap for the left wing seemed forever.
Posted by Picasa
And of course the inboard leading skin as well...
Posted by Picasa
Same goes to the center leading skin..
Posted by Picasa
Clamped and tightened with afew nylon strap and w/ alignment checked, i started to drill the outboard leading skin to the left wing front spar.
Posted by Picasa
Clamped and tightened witha few nylon strap and w/ alignment checked, i started to drill the outboard leading skin to the forward spar.
Clamped and tightened with a few nylon straps plus w/ alignment checked, i started drilling the outboard leading skin to the front spar.
Close up view of the front ,aft spar and ribs w/ all #30 rivet holes drilled looking inboard
Posted by Picasa
With the outboard leading skin of left wing tightened with a few nylon strap and clamped in position ( alignment checked as well), i started to rivet the skin to the forward spar.
Close up view of the left wing front spar assembly looking inboard.
Posted by Picasa
With all #30 holes drilled on rib/spar assemblies.
Posted by Picasa
Taking time to take the famous V sign photo..Note the digital leveler i used frequently to check for true alignment in between drilling as well.
Posted by Picasa
Happily drilling holes with limited space available due to my dad's water filters.
Posted by Picasa
The appropriate five rivet holes already drilled. This prominent station is at STA 69.0 due to the back to back main ribs fitting.
Posted by Picasa
Five rivet holes drilled with #30 bit as instructed by the manual at a station on the left wing front spar.
Posted by Picasa
All the leading edge and main ribs between station 33.2 and 144.95 would need five #30 holes while the rest require only three each. For convenience sake, i have marked down all stations along the spar.
Posted by Picasa
Tadah!!
Posted by Picasa
Drilling the rivet holes of the aileron cove rib 1 through the aft spar while being clamped against flap cove rib 14.
Posted by Picasa
Posted by Picasa
Result of an hour plus of cutting and breaking a few Dremel cutting wheels.
Posted by Picasa